
Brother DCP-T710W Driver for Mac, Windows, and Printer Setup – The Brother DCP-T710W is a solid all-in-one printer that offers a range of features at an affordable price point. One of the standout features of this printer is its ink tank system, which allows for more cost-effective printing in the long run.
In terms of print quality, the Brother DCP-T710W produces sharp and vibrant prints with a high resolution of up to 6000 x 1200 dpi. Its print speed is decent, although not the fastest in its class, with up to 12 pages per minute for black and white documents and 10 pages per minute for color documents.
The scanning function is also quite good, with a maximum optical resolution of 1200 x 2400 dpi, although it doesn’t offer an automatic document feeder for scanning multiple pages at once. The standalone copying function is also a nice touch, with options for resizing and sorting.
Connectivity options for the Brother DCP-T710W are robust, with Wi-Fi, Wi-Fi Direct, USB, and mobile printing capabilities via Brother’s iPrint&Scan app or other third-party apps.
One downside to this printer is that it can be a bit noisy when in use, and it doesn’t offer automatic duplex printing (double-sided printing) capabilities. Additionally, while the initial cost of the printer is affordable, replacement ink bottles can be a bit pricey.
Overall, the Brother DCP-T710W is a solid choice for a home or small office printer that offers good print quality, robust connectivity options, and a cost-effective ink tank system.
Brother DCP-T710W Scanner app
The Brother DCP-T710W printer has a scanner function that can be used with the Brother iPrint&Scan app, which is available for free on both iOS and Android devices. Here are the steps to use the scanner function on the app:
- Install the Brother iPrint&Scan app on your device from the App Store (iOS) or Google Play Store (Android).
- Make sure your printer and mobile device are connected to the same Wi-Fi network.
- Open the Brother iPrint&Scan app and select the “Scan” option from the main menu.
- Place the document or photo you want to scan on the scanner glass.
- Select the scan settings you want to use, such as color or black and white, resolution, and file format.
- Tap the “Scan” button to begin the scanning process.
- Once the scan is complete, you can preview the scanned image on your device and save it to your device or send it as an email attachment.
Note that the Brother iPrint&Scan app also allows you to print from your mobile device and access other printer functions such as ink level monitoring and maintenance functions.
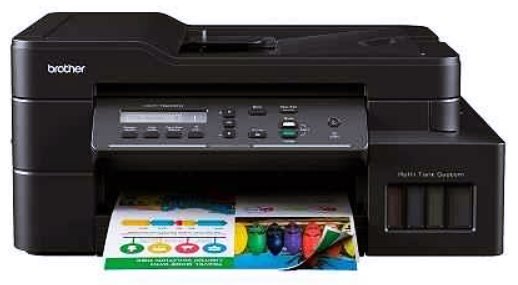
Brother DCP-T710W
The Brother DCP-T710W is an inkjet all-in-one printer that offers printing, scanning, and copying functionalities. Here are some of its key features:
- Print speed: up to 12 pages per minute (ppm) for black and white documents and 10 ppm for color documents
- Print resolution: up to 6000 x 1200 dpi (dots per inch)
- Paper handling: up to 150 sheets in the input tray and up to 50 sheets in the output tray
- Connectivity: Wi-Fi, Wi-Fi Direct, USB, and mobile printing via Brother iPrint&Scan app or other third-party apps
- Scanning: flatbed scanner with a maximum optical resolution of 1200 x 2400 dpi
- Copying: standalone copying capability with options for resizing and sorting
The printer also comes with Brother’s Ink Tank System, which uses refillable ink tanks instead of traditional cartridges, making it more cost-effective for users who print frequently.
Recommended Printer: Brother DCP-9020CDW Driver and Software
Brother DCP-T710W Wireless Setup
A. Factory Reset
- First, hit the menu button on your machine.
- Then, use the bottom-up button to find the network menu. And then, hit ok.
- After that, choose factory reset, and then hit ok.
- Next, select number 1 (If your printer has a fax button. Otherwise, follow the instruction on the screen).
- Your printer is going to reset the network automatically.
- Then, you should do a wizard setup to activate the wireless.
- Continue by pressing the menu button by using the bottom-up button to find “network” and ok.
- Choose “WLAN”. Then, press ok.
- Select “setup wizard”, and then wait for a moment. Your machine is searching for the SSID. Once this process is done, hit back.
- After completing the steps, the Wi-Fi icon will appear at the top of the screen.
B. Setting on Computer
- Insert the CD driver.
- Select the language.
- Next, choose the “initial installation” menu
- Then, select “install MFL-Pro Suite”
- Select yes and wait for a moment.
- After that, continue by choosing a wireless network connection. Then, choose next.
- Check all the options and choose next.
- If your Wi-Fi has detected the printer, choose the printer and select next until a pop-up message shows and instructs you to restart your device.
- On the other hand, if your Wi-Fi does not detect it, choose the second option that identifies your machine by address.
- Fill in your IP address in your computer on the blank column.
- Here, you can check the IP address in your computer: choose menu > network> Wlan> TCP/IP> IP address.
- If you have completed the process, your computer will process it immediately until you get a message “Brother Registration”. After that, choose next and restart your computer.
C. Setting on Wireless Network Connection
- On your PC/ network, search for Wireless Network Connection
- After that, choose “SETUP” in the option. Choose the wireless network and select Connect
- Next, choose “Connect Anyway” and wait for a moment until you see that your wireless is connected.
Brother DCP-T710W Wifi Setup Guideline
- You have to check that your printer is on.
- Go to the Network menu selection > Reset Network > Press no.1 (to restart the printer)
- After that, the machine will enter the Default Printer mode
- You have to choose Network > Setup Wizard so you can continue the process.
- Then, choose SSID > and then choose NEW SSID (The machine will ask you to create a username and password). After that, press OK
- Next, choose AD-HOC and connect it to the SSID you have created (The printer will print the printer status automatically. After that, wait for 1 to 5 minutes so the printer will connect via scan IP address)
- Your Wi-Fi setup installation is complete. After that, try to connect your laptop or computer to the SSID printer.
How to Driver Installation :
- Use a USB cable to connect the computer and printer.
- Double-click on the file that you downloaded.
- After that, open the installed file & click run
- Follow the on-screen installation instructions.”
Note :
This file applies to numerous Brother products and may be compatible with operating systems that your model is not.
How to uninstall:
- Open the Control Panel,
- Click uninstall the program,
- Double-click on the drivers that will Uninstall, then click yes/ok,
- Follow until the uninstall wizard is complete and click Finish.
Brother DCP-T710W Driver and Software Download
| Operating System | Download |
| Brother DCP-T710W Driver Windows 64-Bit Windows 11, Windows 10 64-bit, Windows 8.1 64-bit, Windows 8 64-bit, Windows 7 64-bit, Windows XP 64-bit, Windows Vista 64-bit |
Download |
| Brother DCP-T710W Driver Windows 32-Bit Windows 11, Windows 10 32-bit, Windows 8.1 32-bit, Windows 8 32-bit, Windows 7 32-bit, Windows XP 32-bit, Windows Vista 32-bit |
Download |
| Brother DCP-T710W Driver Mac Macintosh macOS 13.x, macOS 12.x, macOS 11.x, macOS 10.15.x, macOS 10.14.x, macOS 10.13.x, macOS 10.12.x, Mac OS X 10.11.x, Mac OS X 10.10.x, Mac OS X 10.9.x, Mac OS X 10.8.x, Mac OS X 10.7.x. |
Download |
| Brother DCP-T710W Printer Driver Download | Brother Official Site |